
Navigating the world of gluten-free baking can be challenging, especially when you’re craving the complex flavors and chewy texture of classic sourdough. Many store-bought gluten-free breads fall short, offering a dry, crumbly experience that leaves you unsatisfied. If you’ve missed the ritual of slicing into a crusty, fermented loaf, you’re in the right place. Our Gluten Free Sourdough Bread recipe is designed to bridge that gap, delivering a deeply flavorful, airy, and truly satisfying loaf that fits your dietary needs without sacrificing quality or taste.
This recipe harnesses the power of a dedicated gluten-free sourdough starter and a meticulously balanced blend of gluten-free flours to create a bread that is fermented for optimal flavor and texture. It’s an accessible approach to a seemingly complex bake, focusing on clear steps and reliable results.
Why You’ll Love This Recipe
You’ll love this Gluten Free Sourdough Bread for its incredibly complex, authentic sourdough flavor, achieved through a long fermentation process. The crust is beautifully golden and crisp, while the interior is surprisingly soft, airy, and chewy—a rare feat in gluten-free baking. It’s also incredibly rewarding to make, offering the satisfying process of nurturing a starter and watching your loaf rise. This recipe is straightforward enough for determined beginners and naturally gluten-free, providing a wholesome, nutritious option for anyone managing celiac disease or gluten sensitivity. Plus, it’s highly versatile, making fantastic toast, sandwiches, or an accompaniment to soups and stews.
Ingredients
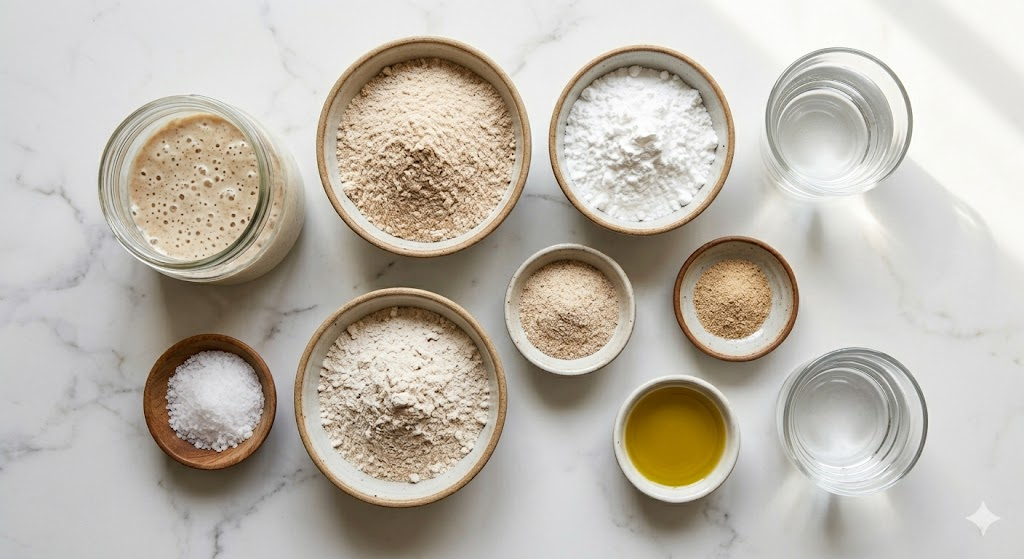
- 100 grams active gluten-free sourdough starter (fed within 4–8 hours)
- 350 grams warm water (approx. 90°F / 32°C)
- 15 grams psyllium husk powder
- 20 grams olive oil or neutral oil
- 150 grams brown rice flour
- 100 grams sorghum flour
- 100 grams tapioca starch/flour
- 10 grams fine sea salt
Ingredient Notes
Using an active, bubbly gluten-free starter (Image 1) is essential for the rise and characteristic tang. Your starter must be vibrant. Psyllium husk powder is absolutely critical, acting as the binder to provide structure and elasticity—do not omit or substitute this. If you can only find whole psyllium husks, grind them into a fine powder before measuring.
The blend of brown rice, sorghum, and tapioca flours balances flavor, structure, and lightness. We highly recommend sticking to these ratios. However, you can try substituting 50g of the sorghum flour with millet flour for a milder taste. Ensure all your flours are certified gluten-free if managing celiac disease. For oil, olive oil adds a lovely depth, but avocado oil also works well. For salt, always use a high-quality fine sea salt for the best flavor distribution.
How to Make This Recipe
- Feed your gluten-free sourdough starter 4–8 hours before you plan to bake. Ensure it is active and bubbly (Image 1) before proceeding.
- In a small bowl, whisk the psyllium husk powder into the warm water (Image 1) until smooth. Let it sit for 5–10 minutes; it will become a thick, gel-like slurry. Whisk in the olive oil.
- In a large bowl, whisk together the brown rice flour, sorghum flour, tapioca starch, and sea salt.
- Add the psyllium gel slurry and the active sourdough starter to the dry ingredients.
- Mix with a sturdy spatula or your hands until a cohesive dough forms. The dough will be much stickier and shaggier than wheat dough.
- Cover the bowl with plastic wrap or a damp towel and let it rest at room temperature (about 70°F/21°C) for 1 hour. This is the ‘bulk rise.’
- After 1 hour, perform a set of ‘strengthen and folds’: gently wet your hands, and lift and fold the dough over itself in the bowl 4–5 times. Cover and rest for 30 minutes. Repeat this process 3 more times over 2 hours.
- Lightly dust a banneton (proving basket) with brown rice flour. Shape the dough into a tight boule and place it seam-side up in the banneton. Cover and cold-proof in the refrigerator for 12–24 hours.
- Preheat your oven to 475°F (245°C) with a Dutch oven or heavy baking pot inside for 45 minutes.
- Turn the proofed dough out onto a piece of parchment paper. Score the cold dough with a sharp lame or razor (Image 0).
- Carefully lift the dough (using the parchment paper) and place it into the preheated Dutch oven. Cover immediately.
- Bake for 20 minutes with the lid on.
- Reduce the oven temperature to 425°F (220°C) and bake for another 25 minutes with the lid off, until the crust is deeply golden (Image 0).
- Remove the bread from the Dutch oven and cool completely on a wire rack for at least 3–4 hours (critical!).
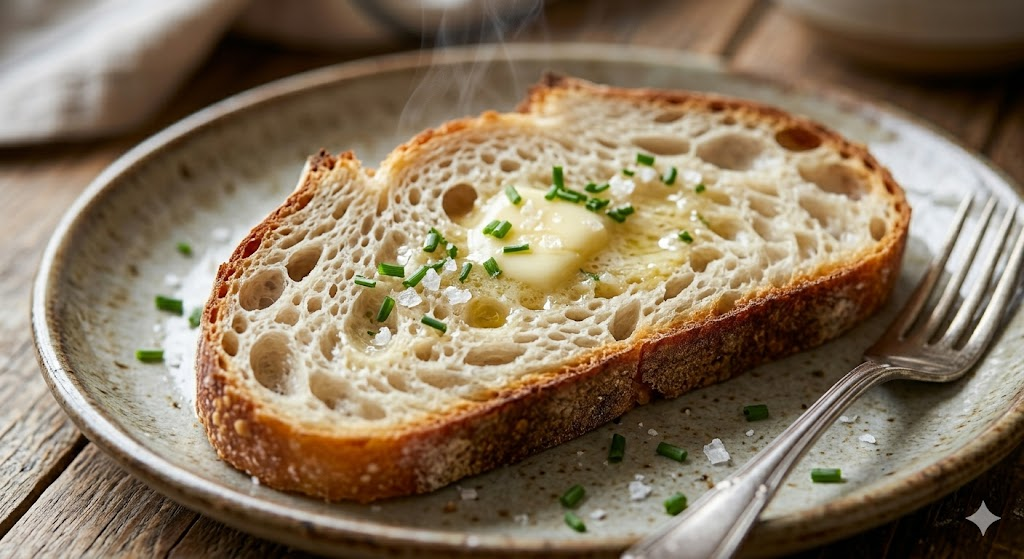
- Slice (Image 2) and serve.
Recipe Tips
- Feed your starter regularly: A vibrant, active starter is non-negotiable for a good rise.
- Cold proofing is key: The slow fermentation in the fridge builds superior flavor and makes the dough easier to handle.
- Do not substitute psyllium: Psyllium husk powder is required; the whole husks won’t mix in properly.
- Use a Dutch oven: This traps steam, mimicking a professional oven and creating that incredible crust.
- Score your dough: It provides a weak point for expansion, leading to a lighter loaf and preventing cracks.
- Be patient: Let the loaf cool completely (3–4 hours!) before slicing; this sets the internal crumb structure.
Variations
While we encourage mastering the base recipe, here are some reliable variations:
- Seed & Grain Loaf: Add 50g of mixed gluten-free seeds (sunflower, pepita, flax, sesame) and 20g of gluten-free rolled oats to the initial dry mix.
- Rosemary & Olive: Fold in 2 tablespoons of chopped fresh rosemary and 50g of sliced Kalamata olives during the first set of folds.
- Spiced Fruit Sourdough: Add 1 tablespoon of cinnamon, a pinch of nutmeg, and 75g of dried fruit (raisins, cranberries) to the dry mix.
- Teff or Millet Sourdough: Substitute 50g of the sorghum flour with teff flour or millet flour for varied flavor.
- Sandwich Loaf: Bake this recipe in a 9×5 inch loaf pan instead of shaping a boule, adjusting bake time as needed.
Storage
Store the completely cooled loaf (Image 0) in a breathable bread bag or linen towel at cool room temperature for up to 3 days. Slicing only what you need will keep the rest of the loaf fresher.
For longer storage, slice the entire loaf and place parchment paper between the slices. Freeze the pre-sliced loaf in a sealed freezer-safe container for up to 3 months.
To reheat, toast the slices directly from frozen or room temperature until warm and crisp (Image 2). The toasted slices regain their wonderful texture.
Serving Suggestions
- Simple Toast: Sliced warm with salted butter (Image 2).
- Avocado Toast: Mashed avocado, red pepper flakes, and a squeeze of lemon.
- Bruschetta: Toasted, rubbed with garlic, and topped with diced tomatoes, fresh basil, and olive oil.
- Soup Side: The perfect companion for dipping into a hearty tomato soup or minestrone.
- Classic Sandwiches: Ideal for stacking with your favorite gluten-free fillings.
- French Toast: Slices soaked in a spiced egg wash and griddled.
- Garlic Bread: Sliced, brushed with garlic-herb butter, and toasted until golden.
Nutrition Information
(Estimates based on one slice, assuming a 15-slice loaf)
Calories: 165
Protein: 3g
Carbohydrates: 34g
Fat: 2.5g
Fiber: 4g
Sugar: 0g
Sodium: 260mg
Frequently Asked Questions
Can I use store-bought gluten-free flour instead of the blend?
While you might get acceptable results, this specific blend of brown rice, sorghum, and tapioca starch has been meticulously balanced for the characteristic sourdough texture (Image 2) and chew. Store-bought “all-purpose” blends vary greatly in their ratios of binders (which we add via psyllium), which can significantly affect the crumb structure and hydration, often leading to a denser loaf.
How do I know if my gluten-free starter is active enough?
Your starter (Image 1) should double or triple in volume within 4–6 hours of feeding at room temperature. It should look very bubbly, foamy, and have a strong, pleasantly yeasty/fruity aroma. A weak starter will result in a heavy, flat loaf.
Can I use psyllium husks instead of the powder?
No, they are not interchangeable for this recipe. Psyllium husk powder is much finer and hydrates instantly, creating the essential ‘mucilage’ that provides structure. Whole husks will not dissolve or distribute correctly, leading to a lumpy, poorly risen dough. If you can only find whole husks, grind them into a fine powder with a spice grinder.
Why is the Dutch oven necessary?
A Dutch oven mimics the steam-injection ovens used by professional bakers. By trapping the initial steam released during baking, it keeps the crust soft, allowing the bread to expand fully (the ‘oven spring’) for maximum volume and a lighter crumb (Image 0). Once the lid is removed, the heat browns and hardens the crust.
Can I bake this loaf in a regular loaf pan?
Yes, but the texture and rise will differ. Grease and line a 9×5 loaf pan with parchment paper. After cold-proofing, turn the dough into the prepared pan. Bake, uncovered, at 400°F (200°C) for 60–70 minutes, or until the loaf reaches an internal temperature of 208°F (98°C). The crust will be softer.
Why does the bread need to cool completely before slicing?
This is the most crucial step! Slicing warm gluten-free bread can compress the delicate internal crumb structure, leading to a gummy and dense interior. During cooling, the internal steam releases, the starches set, and the gluten-free binders stabilize, resulting in a perfect, airy slice (Image 2).
Equipment You’ll Need
- Kitchen scale (essential for accurate GF baking)
- Active gluten-free sourdough starter (Image 1)
- Glass or ceramic mixing bowls
- Whisk
- Sturdy spatula
- Banneton or proofing basket (lined with cloth and rice flour)
- Lame or very sharp razor (Image 0)
- Dutch oven or heavy baking pot with lid
- Parchment paper
- Cooling rack
- Serrated bread knife
Final Thoughts
Making your own Gluten Free Sourdough Bread is a truly satisfying journey, connecting you to the ancient art of fermentation. Seeing a beautiful, golden-crusted loaf emerge from your oven (Image 0) is incredibly rewarding, but the real magic happens when you slice into it. The authentic tang, complex flavor, and surprisingly soft, airy crumb (Image 2) offer a depth of satisfaction that no store-bought substitute can match. We hope this reliable recipe guides you confidently to a fantastic bake, bringing the joy of high-quality sourdough back to your table. We’d love to know how your loaf turns out and how you enjoy it!