
At The Healthy Plate Lab, we believe that the foods you grew up loving don’t have to disappear just because you’re paying closer attention to sugar, sodium, or empty calories. Classic bread and butter pickles are a perfect example: that sweet-tangy crunch is nostalgic, addictive, and — in its traditional form — loaded with refined sugar. A standard recipe can pack 8 to 12 grams of sugar per serving, turning what should be a low-calorie, fiber-friendly vegetable snack into a glycemic spike disguised as a condiment.
Our philosophy is simple: identify the ingredient doing the most metabolic damage, then replace it with something that delivers the same sensory payoff without the downside. For bread and butter pickles, that means swapping the bulk of the granulated sugar for a blend of allulose or monk fruit sweetener, which provide sweetness without spiking blood glucose, while keeping a small amount of real sugar for authentic caramelized depth and proper pickle chemistry. We also lean into apple cider vinegar instead of plain white vinegar, which adds a gentle fruity acidity and a small dose of beneficial acetic acid compounds that have been studied for their role in supporting healthy blood sugar response after meals.
Cucumbers themselves are a nutritional bargain — over 95% water, naturally low in calories, and a good source of vitamin K and potassium. The real transformation happens in the brine. By using a sugar-reduced, mineral-rich brine, we turn a humble vegetable into a probiotic-adjacent, gut-friendly snack that satisfies a sweet-and-salty craving for a fraction of the caloric cost. This recipe is gluten-free, vegetarian, and can easily be made vegan by skipping the optional butter-basted onion step. It’s the kind of small swap that keeps a beloved comfort food in your rotation for life, not just for a 30-day reset.
Ingredients & Nutritional Benefits
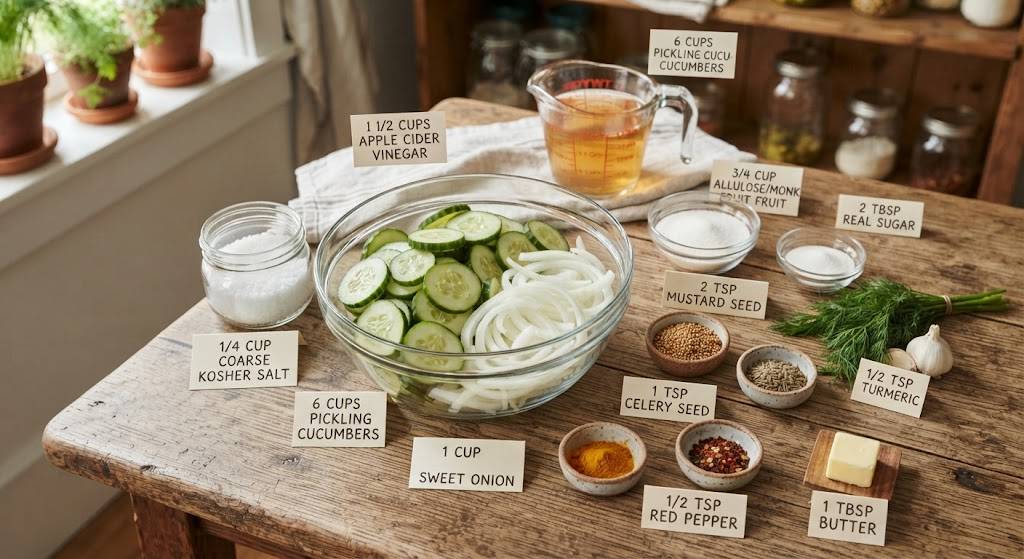
- 6 cups pickling cucumbers, thinly sliced (about 1/8-inch) — Low-calorie, hydrating, and a great source of crunch and potassium.
- 1 medium sweet onion, thinly sliced — Adds prebiotic fiber and natural sweetness, reducing the need for added sugar.
- 1/4 cup coarse kosher salt (for the draw-out brine) — Pulls excess water from the cucumbers for maximum crunch retention.
- 1 1/2 cups apple cider vinegar — Provides tang and acetic acid, which may help moderate post-meal blood sugar response.
- 3/4 cup allulose or monk fruit sweetener blend — Delivers the classic “bread and butter” sweetness with minimal impact on blood glucose.
- 2 tablespoons real sugar (optional, for authentic caramelization of flavor) — A small amount goes a long way; this keeps the brine balanced without the full sugar load.
- 2 teaspoons mustard seed — Adds a peppery, slightly nutty depth and supports digestion.
- 1 teaspoon celery seed — The signature bread and butter pickle aromatic; also a source of antioxidant compounds.
- 1/2 teaspoon ground turmeric — Gives the brine its classic golden hue and contributes anti-inflammatory curcumin.
- 1/2 teaspoon crushed red pepper flakes (optional) — A subtle heat that balances the sweetness.
- 1 tablespoon grass-fed butter (optional, for onion finishing) — Adds richness if you want a deeper, more savory undertone; omit for a fully plant-based version.
Every ingredient here is doing double duty: flavor and function. The mustard and celery seeds aren’t just nostalgic flavor markers, they’re also functional spices that have been used traditionally to support digestion, which pairs nicely with a fermented-adjacent food like pickles.
Chef’s Prep Secrets & Tips
The single biggest mistake home cooks make with bread and butter pickles is skipping the salt draw-out step. This is non-negotiable if you want that famous snap instead of a limp, waterlogged slice. Layer your sliced cucumbers and onions in a colander set over a bowl, sprinkle generously with the coarse salt, and let them sit for a full hour at room temperature. You’ll watch the volume visibly shrink as the salt pulls liquid out through osmosis — this is the same principle that keeps the final pickles crisp rather than mushy.
After the hour, rinse thoroughly under cold water, two or three times, to remove the excess surface salt. This step matters for sodium control: rinsing well can reduce the final sodium content of each pickle by close to half compared to leaving the draw-out salt in place.
For uniform slices, a mandoline set to 1/8-inch is worth the investment — uneven slices mean uneven pickling, with some pieces over-brined and others under-seasoned. If you don’t have one, a sharp chef’s knife and a steady hand will do; just aim for consistency over speed.
One more pro tip: warm your sweetener and vinegar together gently before adding the spices. Allulose and monk fruit blends dissolve more slowly than table sugar, and a few extra minutes of gentle heat ensures a fully smooth, grit-free brine.
Step-by-Step Culinary Method
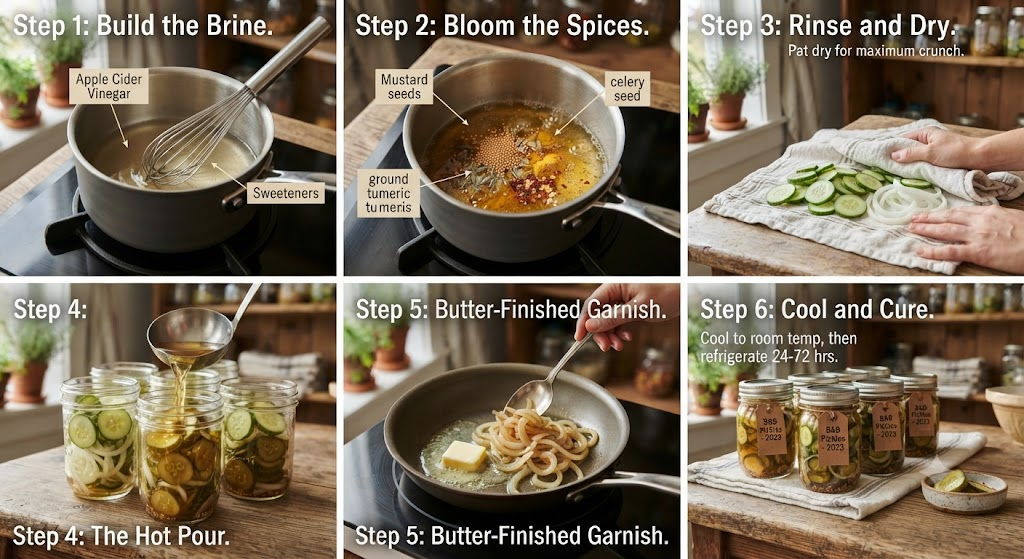
Step 1: Build the Brine Base. In a medium non-reactive saucepan, combine the apple cider vinegar, allulose or monk fruit sweetener, and the optional 2 tablespoons of real sugar. Set the heat to medium and stir continuously. Within a minute or two, you’ll notice the liquid shift from cloudy to glassy clear as the sweetener fully dissolves — this visual cue is your signal that the base is ready for spices.
Step 2: Bloom the Spices. Add the mustard seed, celery seed, turmeric, and red pepper flakes directly into the warm vinegar mixture. Listen closely here: you’ll hear a faint, almost imperceptible sizzle as the seeds hit the hot liquid, releasing their essential oils. The kitchen should fill with a warm, slightly peppery aroma layered over the sharp tang of the vinegar — this is the brine’s personality coming together. Let it simmer gently for 3-4 minutes, just until the turmeric tints the liquid a deep golden amber and the mixture coats the back of a spoon lightly. Do not let it reach a hard boil; you want a gentle simmer that preserves the brightness of the vinegar rather than cooking it flat.
Step 3: Rinse and Dry the Vegetables. After their hour-long salt draw-out, rinse the cucumber and onion slices thoroughly, then spread them on a clean kitchen towel and pat dry. You’re looking for vegetables that feel slightly firm and squeaky between your fingers — a tactile sign that excess moisture is gone and they’re ready to absorb the brine rather than dilute it.
Step 4: The Hot Pour. Pack the cucumber and onion slices tightly into clean glass jars, pressing gently to remove air pockets. Pour the hot brine directly over the vegetables until fully submerged. You’ll hear a soft hiss and see the cucumbers shift color almost immediately, transitioning from a bright, opaque green to a slightly more translucent, deeper olive tone as the heat and acid begin their work. This visible color shift is the first sign that pickling has started.
Step 5 (Optional): Butter-Finished Onion Garnish. For a richer variation, melt the grass-fed butter in a small skillet over medium-low heat and add a handful of reserved onion slices. Cook for 5-6 minutes, stirring occasionally, until they turn soft and lightly golden at the edges, with a sweet, nutty aroma replacing their initial sharpness. Fold these into the jar just before sealing for an extra layer of savory depth. Omit this step entirely for a vegan version — the pickles are just as delicious without it.
Step 6: Cool and Cure. Let the jars cool to room temperature on the counter, about 45 minutes. You’ll notice the brine settle and clarify slightly as it cools, while the cucumbers continue to soften just enough to lose their raw bite without losing their crunch. Seal the jars and refrigerate for at least 24 hours before eating, though 48-72 hours produces the best flavor development as the spices fully infuse the vegetables.
Plating & Final Presentation
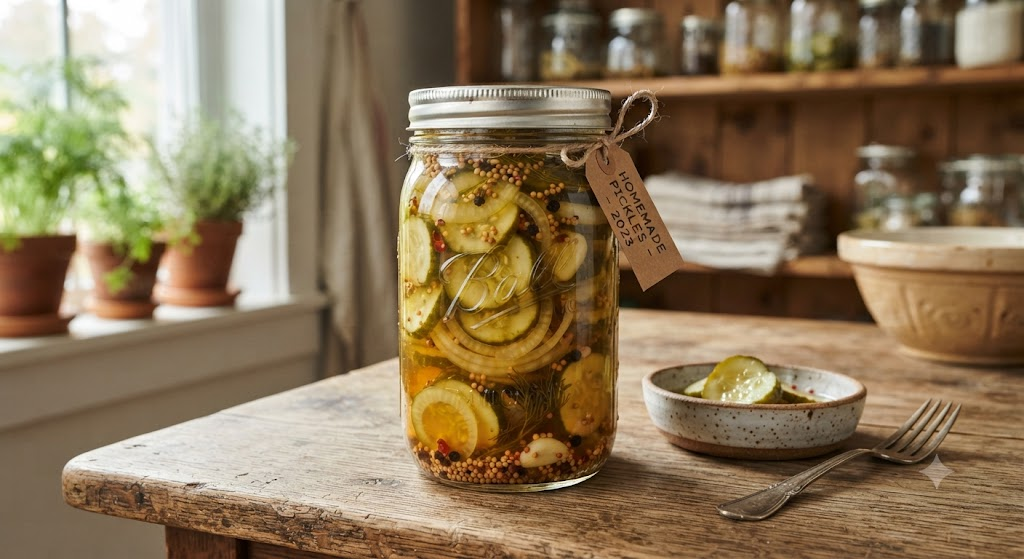
Bread and butter pickles are humble by nature, but presentation still matters. For serving, arrange the pickle slices in a slightly overlapping fan on a small ceramic dish, letting a few onion ribbons cascade over the top for visual texture. A light scatter of extra celery seed or a few whole mustard seeds across the top reinforces the flavor story before the first bite. These pickles shine alongside a high-protein burger, folded into a chickpea salad, or simply eaten straight from the jar with a fork — no judgment here, that’s half the point of keeping a healthier version on hand.
Frequently Asked Questions
Can I use a different low-calorie sweetener? Yes — erythritol, stevia blends, or monk fruit all work, though each has a slightly different sweetness curve and aftertaste, so start with less and adjust to taste.
How long do these pickles last? Stored in a sealed jar in the refrigerator, they stay crisp and flavorful for 4-6 weeks.
Why did my pickles turn out soft instead of crisp? This almost always traces back to skipping or shortening the salt draw-out step, or using cucumbers that were already past their peak freshness.
Is this recipe truly gluten-free? Yes, naturally — just double-check that your mustard seed and any pre-made spice blends are processed in a gluten-free facility if you have a severe sensitivity.
Can I can these for shelf-stable storage? This recipe is designed as a refrigerator pickle for safety and simplicity; true shelf-stable canning requires a validated, tested recipe and proper processing time.
Final Nutrition Facts Table
Per 1/4 cup serving (approximately 6-8 slices)
| Nutrient | Amount |
|---|---|
| Calories | 18 kcal |
| Total Carbohydrates | 4 g |
| Dietary Fiber | 1 g |
| Sugars | 1.5 g (vs. ~9 g in traditional recipe) |
| Net Carbs | 3 g |
| Protein | 0.5 g |
| Total Fat | 0 g (0.5 g with optional butter) |
| Sodium | 95 mg (post-rinse) |
| Vitamin K | 8% DV |
| Potassium | 3% DV |
Compared to a traditional bread and butter pickle recipe, this version cuts sugar by roughly 80% and reduces overall calories per serving by nearly half — all while keeping the exact sweet, tangy, crunchy bite that made the original a kitchen classic.