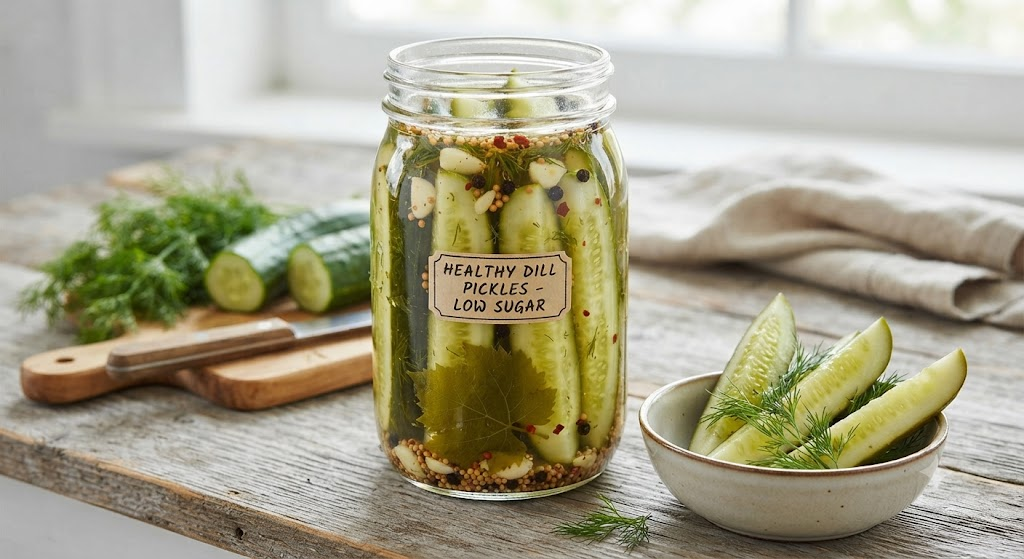
Refrigerator pickles are one of the most rewarding entry points into home food preservation — no pressure canner, no water bath, no waiting weeks for flavor to develop. Just crisp cucumbers, a flavorful brine, and a few days in the fridge before you’re rewarded with a genuinely crunchy, tangy pickle. Unfortunately, most traditional recipes still default to a sugar-heavy brine, sometimes calling for a full cup of sugar per quart, turning a naturally low-calorie vegetable into something closer to candy in disguise. At The Healthy Plate Lab, our goal with this recipe was to build a refrigerator pickle that keeps every bit of that satisfying snap and tang while putting the sugar content firmly back in check.
Cucumbers are an excellent base for a healthy snack to begin with — made up of roughly 95% water, naturally low in calories, and a reasonable source of vitamin K and potassium. The entire nutritional story of a pickle is written by its brine, which is exactly where we focused our attention. Instead of relying on sugar for body and balance, we lean on a combination of high-quality apple cider vinegar and a small amount of allulose or monk fruit sweetener, which delivers the brightness and gentle sweetness pickles need without the blood sugar spike that comes from refined sugar. Apple cider vinegar in particular brings a slightly fruitier, more rounded acidity than plain white vinegar, along with acetic acid compounds that have been studied for their potential role in moderating post-meal blood sugar response.
We also pay close attention to sodium, which is the other ingredient that traditional pickle recipes tend to overuse. By using a measured amount of kosher salt rather than an arbitrary “generous pour,” and by building deep flavor through fresh garlic, dill, and peppercorns instead of relying on salt alone for taste, we create a brine that’s well-balanced rather than aggressively salty. This recipe is naturally gluten-free, vegan, and endlessly customizable — once you understand the base ratio, you can pickle nearly anything in your crisper drawer using the same healthy framework. It’s proof that the simplest preservation method can also be the most nutritionally intentional one.
Ingredients & Nutritional Benefits
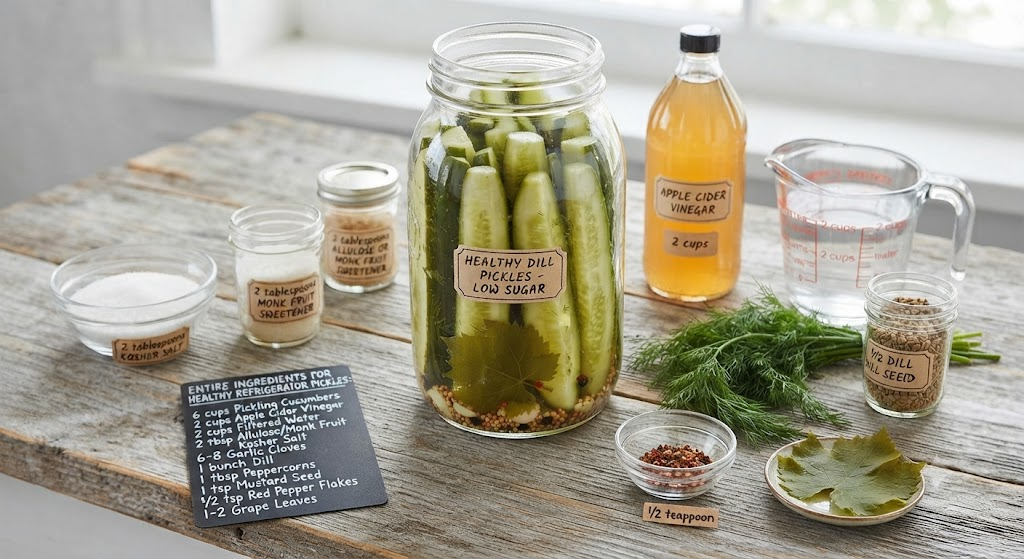
- 6 cups pickling cucumbers, sliced into spears or rounds — Low-calorie, hydrating, and a good source of potassium and vitamin K.
- 2 cups apple cider vinegar — Provides the primary tang and a small dose of beneficial acetic acid compounds.
- 2 cups filtered water — Dilutes the vinegar to a balanced acidity without sacrificing preservation power.
- 2 tablespoons allulose or monk fruit sweetener — Delivers a gentle sweetness to balance the acidity without the blood sugar impact of refined sugar.
- 2 tablespoons kosher salt — Provides essential flavor and helps maintain that classic pickle crunch, used in a measured rather than excessive amount.
- 6-8 fresh garlic cloves, smashed — Adds bold aromatic flavor and trace antioxidant compounds called allicin.
- 1 bunch fresh dill (or 2 tablespoons dill seed) — Contributes the signature herbal, slightly grassy pickle flavor along with digestive-supportive compounds.
- 1 tablespoon black peppercorns — Adds gentle warmth and depth without any added sodium.
- 1 teaspoon mustard seed — Adds a peppery, slightly nutty note and supports the classic deli-pickle flavor profile.
- 1/2 teaspoon red pepper flakes (optional) — Adds a subtle background heat that brightens the overall flavor.
- 2-3 fresh grape or oak leaves (optional) — A traditional tannin source that helps preserve crunch by inhibiting the enzymes that soften cucumbers.
This brine ratio is intentionally simple — by leaning on vinegar, aromatics, and a modest amount of sweetener rather than sugar as the dominant flavor, you end up with a pickle that tastes genuinely vibrant rather than one-dimensionally sweet.
Chef’s Prep Secrets & Tips
The single most important factor in pickle crunch has nothing to do with the brine — it’s cucumber freshness. Pickling cucumbers (sometimes labeled Kirby or Persian cucumbers) should be used within a day or two of purchase, ideally straight from the farmers market. Older cucumbers, even refrigerated, lose moisture and structural integrity over time, and no amount of clever brine science will bring back a crunch that’s already been lost.
Always trim a thin slice off the blossom end of each cucumber before pickling. This end contains enzymes that actively contribute to softening, and removing it is one of the simplest, most effective ways to preserve a firm, crisp texture throughout the pickling process.
For maximum flavor penetration, cut your cucumbers into spears or thick rounds rather than leaving them whole. Whole cucumbers take significantly longer for the brine to fully permeate, while spears and rounds develop full flavor within just a day or two.
If you have access to fresh grape leaves or oak leaves, tucking one or two into each jar is a traditional trick worth trying. These leaves contain natural tannins that help inhibit the softening enzymes in cucumbers, contributing to a noticeably crisper final pickle — a technique long used by experienced picklers before modern calcium chloride crisping agents became common.
Finally, never use chlorinated tap water if you can avoid it. Chlorine can interfere with the fermentation-adjacent flavor development in the brine and occasionally affects color; filtered water produces a cleaner, brighter final product.
Step-by-Step Culinary Method
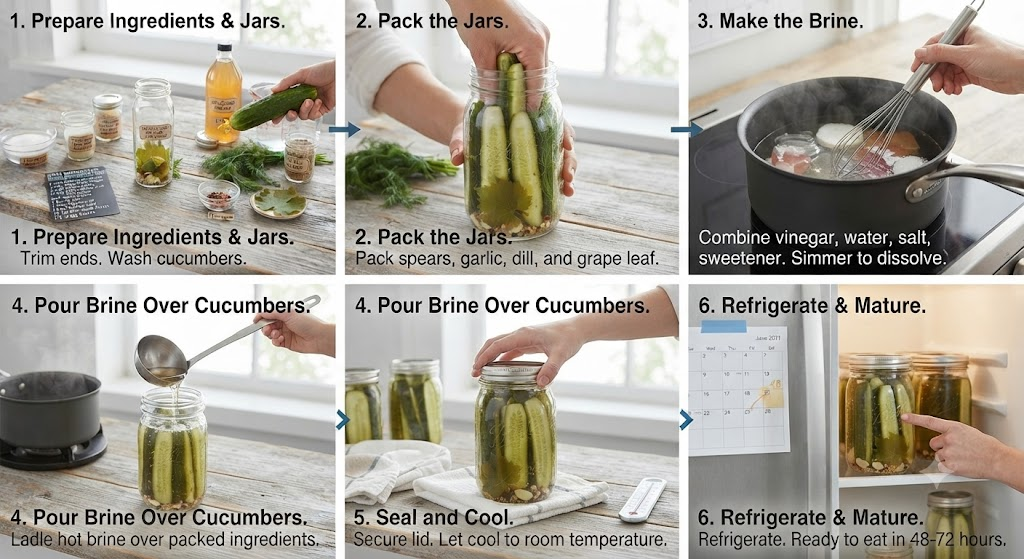
Step 1: Prepare the Cucumbers. Wash the cucumbers thoroughly under cold water, scrubbing away any surface dirt. Trim a thin slice from the blossom end of each one, then slice into spears or 1/4-inch rounds. As you cut, you should hear and feel a firm, slightly resistant snap with each slice — a good auditory cue that your cucumbers are fresh and ready for pickling.
Step 2: Build the Brine. In a medium saucepan, combine the apple cider vinegar, filtered water, allulose or monk fruit sweetener, and kosher salt. Set over medium heat and stir continuously. Within a couple of minutes, you’ll notice the liquid shift from slightly cloudy to clear as the salt and sweetener fully dissolve, with a sharp, clean vinegar aroma rising steadily from the pot.
Step 3: Bring to a Gentle Simmer. Once the salt and sweetener are fully dissolved, bring the brine to a low simmer for 2-3 minutes — just until small bubbles begin breaking the surface steadily. Avoid a hard boil, which can cause excessive evaporation and throw off your final acidity balance. Remove from heat and set aside to cool slightly while you prepare the jars.
Step 4: Pack the Jars. Into each clean glass jar, add a few smashed garlic cloves, a generous handful of fresh dill, a portion of the peppercorns, mustard seed, and red pepper flakes if using, along with a grape or oak leaf if you have one. Pack the cucumber spears or rounds tightly into the jars, standing spears upright when possible for the most visually appealing presentation and the most efficient use of space.
Step 5: Pour the Hot Brine. Carefully pour the warm brine over the packed cucumbers, making sure every piece is fully submerged. You’ll hear a soft hiss as the warm liquid settles around the cold vegetables, and you may notice the cucumbers shift slightly in color, becoming a touch more matte and olive-toned as the vinegar begins making contact. Use a thin spatula or chopstick to gently press out any trapped air bubbles along the inside of the jar.
Step 6: Cool, Seal, and Refrigerate. Let the jars cool to room temperature on the counter, about 30-45 minutes — you’ll see the brine clarify slightly as it cools and settles around the aromatics. Seal tightly with lids and transfer to the refrigerator. While these pickles are technically safe to taste after just a few hours, the real flavor transformation happens over the following 24-72 hours, as the cucumbers gradually shift from a bright, raw crunch to a more rounded, tangy, fully pickled bite.
Plating & Final Presentation

Refrigerator pickles are wonderfully informal, but a thoughtful serving still elevates the experience. Arrange a handful of spears standing upright in a small glass or jar at the center of a charcuterie board, surrounded by fresh dill sprigs and a few whole garlic cloves pulled straight from the brine for a rustic, just-made look. For rounds, fan them out slightly overlapping on a small plate alongside a sandwich or burger, allowing their bright green color and visible flecks of dill and mustard seed to stand out. A small bowl of the reserved brine alongside makes for an unexpectedly refreshing sipping shot for pickle enthusiasts.
Frequently Asked Questions
How long do refrigerator pickles last? Stored sealed in the refrigerator, they stay crisp and flavorful for 4-6 weeks.
Can I reuse the brine for a second batch of cucumbers? It’s best to make a fresh brine for each batch, as the flavor and acidity weaken significantly after the first use.
Why did my pickles turn out soft? This usually traces back to using cucumbers that weren’t fresh enough, skipping the blossom-end trim, or slicing the cucumbers too thin.
Can I use regular cucumbers instead of pickling cucumbers? You can, but standard slicing cucumbers have thinner skins and higher water content, resulting in a softer, less crunchy final pickle.
Do these need to be processed or canned for shelf storage? No — this recipe is designed specifically as a refrigerator pickle and is not shelf-stable; it must be kept refrigerated at all times.
Final Nutrition Facts Table
Per serving (about 4-5 spears)
| Nutrient | Amount |
|---|---|
| Calories | 15 kcal |
| Total Carbohydrates | 3 g |
| Dietary Fiber | 1 g |
| Sugars | 1 g (vs. ~7 g in traditional recipe) |
| Net Carbs | 2 g |
| Protein | 0.5 g |
| Total Fat | 0 g |
| Sodium | 240 mg |
| Vitamin K | 10% DV |
| Potassium | 3% DV |
Compared to a traditional sugar-heavy refrigerator pickle, this version cuts added sugar by roughly 85% while keeping the same crisp, tangy, deeply aromatic pickle experience — a snack you can genuinely reach for any time without a second thought.