At The Healthy Plate Lab, we don’t believe in choosing between food that tastes incredible and food that actually fuels your body. That mindset is exactly why we started reworking classic dishes like hummus in the first place. Most people assume hummus is already a “health food,” and in some ways it is — but the version sitting in your grocery store’s refrigerated section is often padded with excess oil, preservatives, and stabilizers, while offering surprisingly little protein per serving for something marketed as a nutritious snack.
Our approach is simple: take a dish people already love, understand exactly why the traditional recipe works the way it does, and then identify where small, intelligent swaps can make it more nutritionally functional without sacrificing flavor or texture. This recipe is a perfect case study. Traditional hummus relies almost entirely on chickpeas and tahini for its body and richness. We kept both of those — they’re genuinely good for you — but we added one lab-tested trick: folding in Greek yogurt.
Why does that matter? Protein is the single most satiating macronutrient, meaning it does more to keep you full than fat or carbohydrates, calorie for calorie. By boosting the protein content of something people already eat by the spoonful, we turn a snack that mostly stalls your hunger into one that meaningfully supports it. Combined with the fiber naturally present in chickpeas, this hummus digests slowly, helps stabilize blood sugar, and keeps energy steadier between meals. It’s a small formulation change with a real physiological payoff — and that’s the Healthy Plate Lab approach in a single bite.
Ingredients & Nutritional Benefits
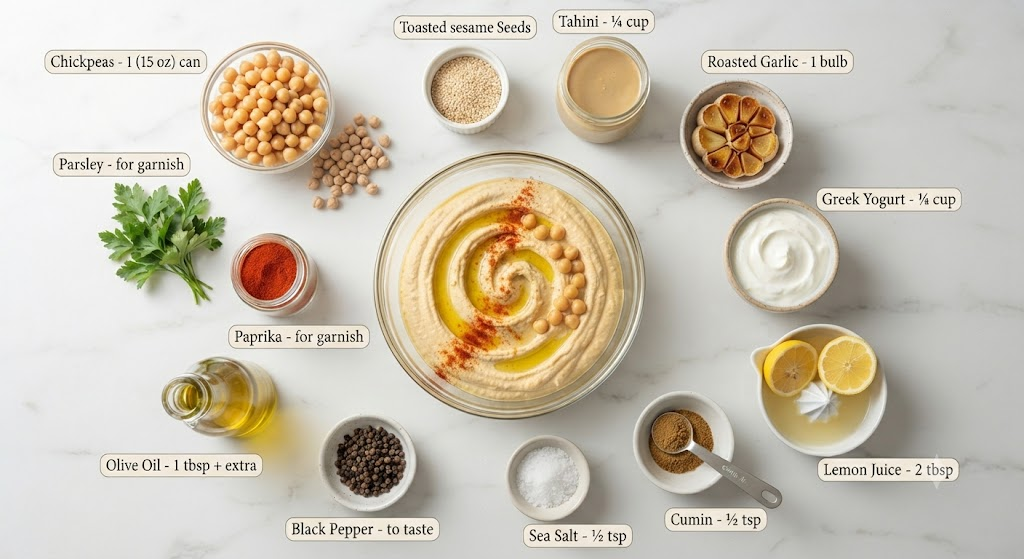
Every ingredient in this recipe earns its place — nothing here is filler.
- 1 whole garlic bulb — Roasting mellows garlic’s sharp bite into something sweet, caramelized, and almost buttery. It also brings modest antioxidant and anti-inflammatory compounds along for the ride.
- 1 tablespoon olive oil (plus extra for roasting and serving) — A source of monounsaturated fat, which supports heart health and helps the fat-soluble flavor compounds in garlic and tahini fully bloom.
- 1 (15 oz) can chickpeas, drained and rinsed (liquid reserved) — The backbone of the recipe. Chickpeas deliver plant-based protein and several grams of fiber per serving, which is central to the slow-digesting, blood-sugar-friendly profile of this dish.
- ¼ cup tahini — Ground sesame paste that contributes healthy fats, a subtle nuttiness, and a meaningful dose of minerals like copper and manganese.
- ¼ cup plain 2% Greek yogurt — Our signature swap. This is what pushes the protein content noticeably higher than a traditional recipe, without diluting flavor.
- 2 tablespoons fresh lemon juice — Brightens the whole dish and balances the richness of the tahini and olive oil.
- ½ teaspoon ground cumin — Adds warmth and depth without overpowering the other flavors.
- ½ teaspoon sea salt — Essential for drawing out flavor; adjust to taste.
- 2–4 tablespoons reserved chickpea liquid (aquafaba) — The unsung hero of great hummus texture, discussed in detail below.
- Paprika, for garnish — A traditional finishing touch that adds color and a whisper of smoky flavor.
Chef’s Prep Secrets & Tips
The difference between hummus that tastes homemade in a good way and hummus that tastes homemade in a “why is this grainy” way almost always comes down to a handful of technique details most recipes skip.
First: roast your garlic instead of using it raw. Raw garlic in hummus can taste sharp and linger unpleasantly. Roasting transforms its chemistry entirely — the pungent compounds mellow and caramelize into something sweet and rounded. Slice the top off the bulb, drizzle it with olive oil, wrap it in foil, and let the oven do the work. You’ll know it’s ready when the cloves have turned a deep golden brown and give easily under gentle pressure.
Second: never discard the liquid from your can of chickpeas. That starchy liquid, often called aquafaba, is what gives well-made hummus its signature light, whipped texture instead of a dense, paste-like consistency. Reserve it before draining the chickpeas, and stream it in gradually while blending rather than dumping it all in at once — this gives you full control over the final texture.
Third: blend longer than feels necessary. Most home cooks stop blending hummus far too early. A full 3 to 5 minutes of processing, with regular scrapes down the sides of the bowl, is what breaks the chickpea skins down completely and produces that silky, almost mousse-like consistency you find in restaurant-quality hummus. If you have a high-powered blender or food processor, use it — the extra torque makes a noticeable difference here.
Step-by-Step Culinary Method
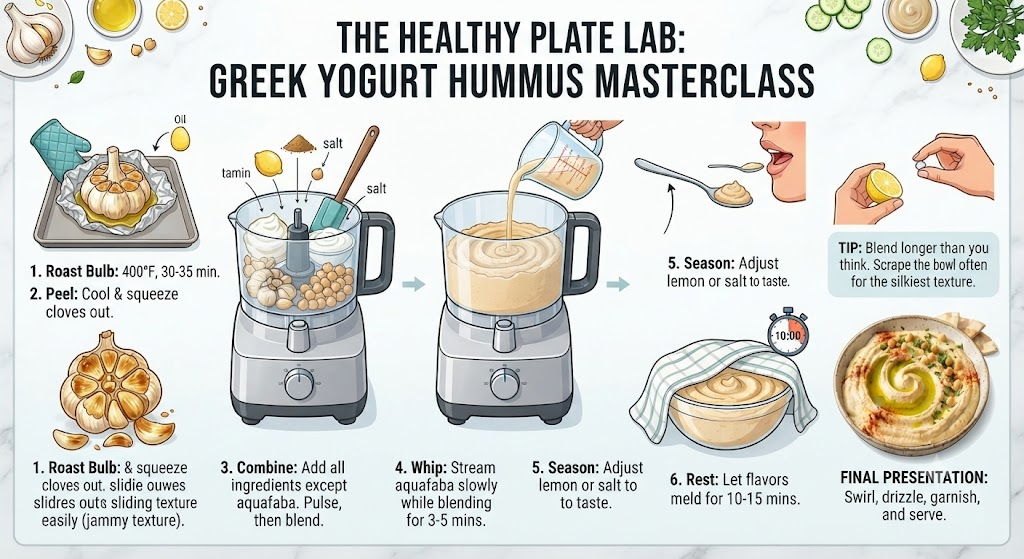
Step 1: Roast the garlic. Preheat your oven to 400°F. Slice about a quarter inch off the top of the garlic bulb so the individual cloves are exposed, drizzle the cut side with a little olive oil, and wrap the whole bulb tightly in foil. Roast for 30 to 35 minutes. As it cooks, your kitchen will slowly fill with a warm, toasty aroma that’s completely different from the sharp smell of raw garlic — sweeter, almost nutty. You’ll know it’s done when the foil packet feels soft when gently squeezed and the exposed cloves have turned a deep amber color.
Step 2: Cool and peel. Let the roasted bulb rest for about 10 minutes, until it’s cool enough to handle comfortably. Then simply squeeze the base of the bulb, and the softened cloves should slide right out of their papery skins with almost no resistance. They’ll be sticky, fragrant, and jammy in texture.
Step 3: Build the base. Add the roasted garlic cloves, drained chickpeas, tahini, Greek yogurt, lemon juice, cumin, and salt to your food processor. Pulse a few times first to break everything down roughly, then switch to a continuous blend. At this stage the mixture will look thick, slightly grainy, and pale — that’s expected. Scrape down the sides of the bowl with a spatula every 60 seconds or so to make sure everything is incorporating evenly.
Step 4: Whip it light. With the processor running, begin streaming in the reserved chickpea liquid a tablespoon at a time. This is the moment you’ll actually see and hear the texture change — the mixture goes from a low, thick churning sound to a lighter, faster whir as air incorporates and the hummus loosens into something closer to whipped butter than paste. Keep adding liquid gradually, tablespoon by tablespoon, stopping once the hummus is light, smooth, and falls easily off a spoon rather than clinging to it in a thick clump.
Step 5: Taste and adjust. Give it a taste. If it needs more brightness, add a touch more lemon juice. If the flavors feel flat, a small additional pinch of salt usually wakes everything up.
Step 6: Finish and rest. Transfer the hummus to a serving bowl. Letting it sit at room temperature for 10 to 15 minutes before serving allows the flavors to settle and meld, especially the garlic and cumin.
Plating & Final Presentation
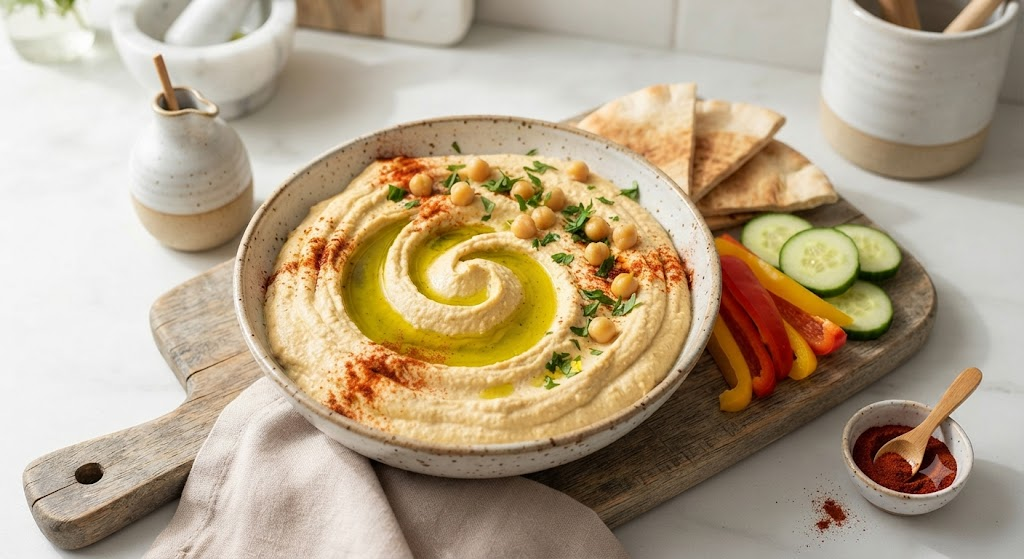
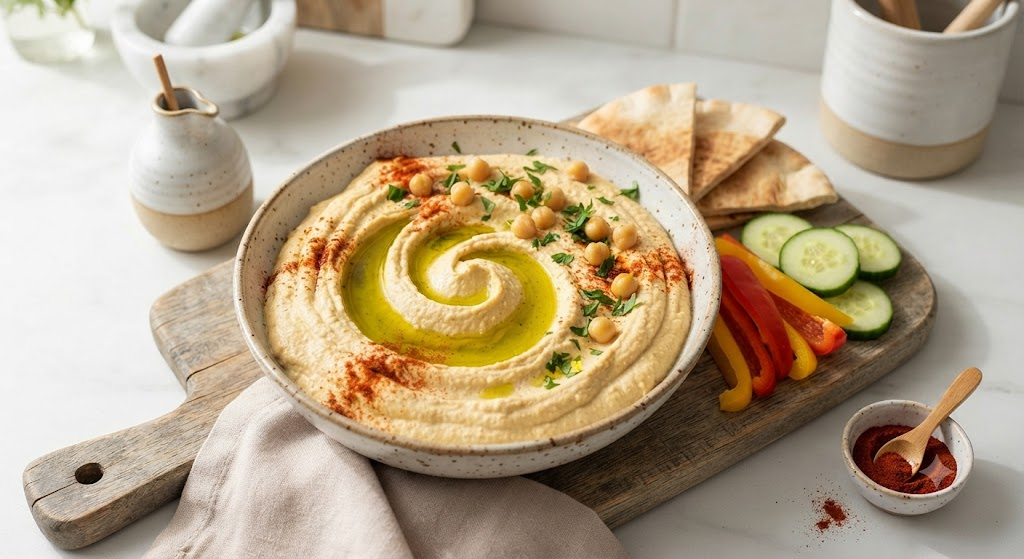
Presentation is where hummus goes from “fine” to genuinely craveable. Spoon the finished hummus into a shallow serving bowl, then use the back of a spoon to create a swirled well in the center — this isn’t just decorative, it also creates a natural pocket to hold your finishing oil. Drizzle a generous amount of good olive oil into that well, letting it pool slightly. Finish with a light dusting of paprika around the edges for color, and if you want extra texture and visual interest, scatter a few whole chickpeas and a pinch of fresh herbs like parsley across the top. Serve with warm pita wedges, sliced cucumber, bell pepper strips, or whole grain crackers arranged around the bowl.
Frequently Asked Questions
Can I make this without a food processor? A high-powered blender works well too, though you may need to stop and scrape down the sides more frequently to keep everything moving.
How long does this hummus last in the fridge? Stored in an airtight container, it stays fresh for up to 5 days. The flavor often deepens after the first day as the garlic and cumin continue to meld.
Can I make this dairy-free? Yes — simply omit the Greek yogurt and add an extra tablespoon of tahini for richness. The protein content will be slightly lower, but the recipe still works well.
Why is my hummus grainy? This usually means it needs more blending time or more reserved chickpea liquid. Both help break down the chickpea skins and loosen the texture.
Can I freeze hummus? It’s best enjoyed fresh, as freezing can alter the texture, making it slightly watery once thawed.
Final Nutrition Facts Table
Per ¼ cup serving (recipe makes about 6 servings):
| Nutrient | Amount |
|---|---|
| Calories | 130 |
| Protein | 6g |
| Carbohydrates | 11g |
| Fat | 8g |
This version delivers noticeably more protein per serving than a standard hummus recipe, thanks to the Greek yogurt, while keeping the fiber and healthy fats that make chickpeas and tahini worth eating in the first place. It’s a snack that does real work for your body — not just something to fill space on a plate.